How to Backup Your Windows PC – Windows 7, 8 and 10

Everyone knows that backing up your windows PC is an important part of maintaining a business computer system, but very few people have a strict routine of backup and testing. In this post we are going to cover the quick and simple ways to use Microsoft Windows Backup programs that are install on your PC already with your operating system.

See below for separate instructions for backup on:

  1. Windows 10 – Microsoft Latest Operating System
  2. Windows 8 and 8.1
  3. Windows 7

Backing Up Windows 10, Microsoft Latest Operating System

  1. You will need a location to backup your data to, such as a USB drive attached to the computer, connect this now.
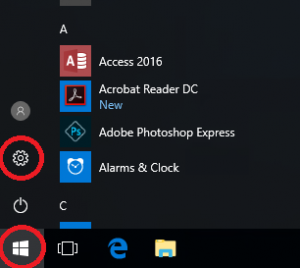
  2. Open the Windows Start Menu and select the ‘Settings’ Icon
    Image of Windows 10 Start Menu Settings Cog
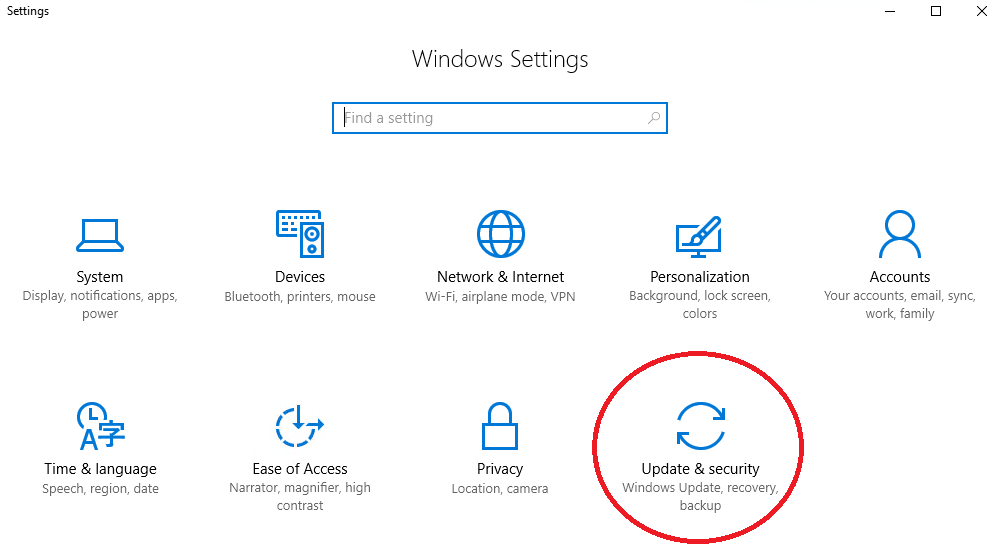
  3. When the Windows Settings App opens, Select the ‘Update and Security’ Section.
    Image of Windows 10 Settings App Menu with the Update and Security Icon Highlighted
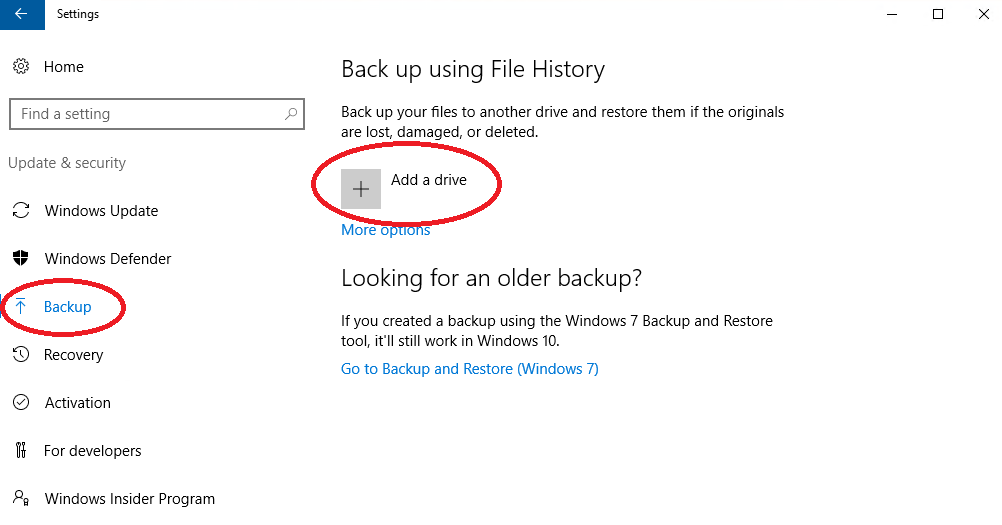
  4. Next, Click on the ‘Backup’ menu at the side and select ‘Add a Drive’
    Image of Windows 10 Update and Security Settings with the Backup and Add Drive Options Highlighted
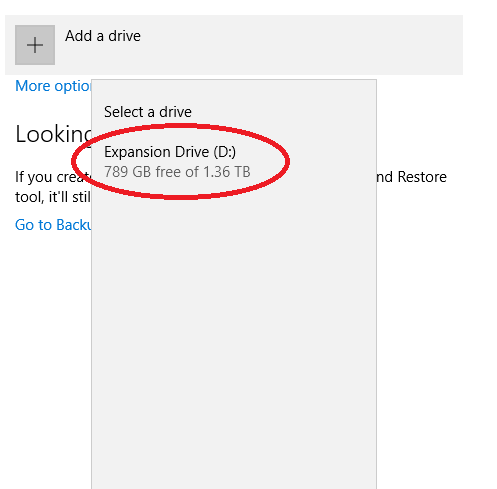
  5. Select the drive you wish to backup to
    Image of Windows 10 Backup Add Drive Section Screen with the Drive to Select Highlighted
  6. Your Done! The ‘Automatically back up my files’ will now show up as ‘On’ and your files will be saved to the USB Drive.
    Image of Windows 10 Update and Security Settings with the Backup and Add Drive Options Highlighted
    You may wish to checkout the ‘More Options’ link to ensure that everything you need is covered in the backup.


Backing Up in Windows 8 and 8.1

  1. You will need a location to backup your data to, such as a USB drive attached to the computer, connect this now.
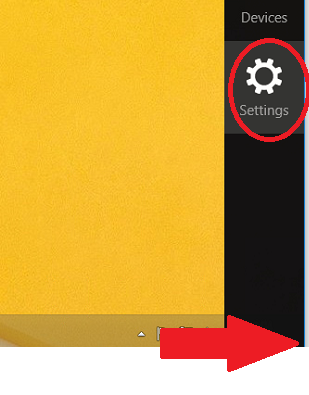
  2. Hover your mouse to the Bottom Right hand corner, A ‘Charms Bar’ will Pop up, Select Settings.
    Windows 8 Backup Charms Bar with Settings Highlighted
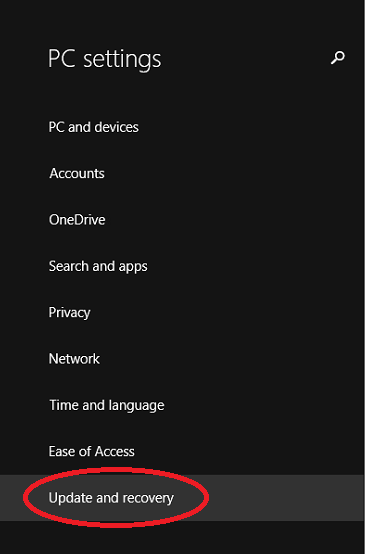
  3. Once the Settings bar is show, select ‘Change PC Settings’
    Windows 8 Backup Settings Bar with Change PC Settings Highlighted
  4. In the PC Settings Window, Select ‘Update and Recovery’
    Windows 8 Backup Settings App with Update and Recovery Highlighted
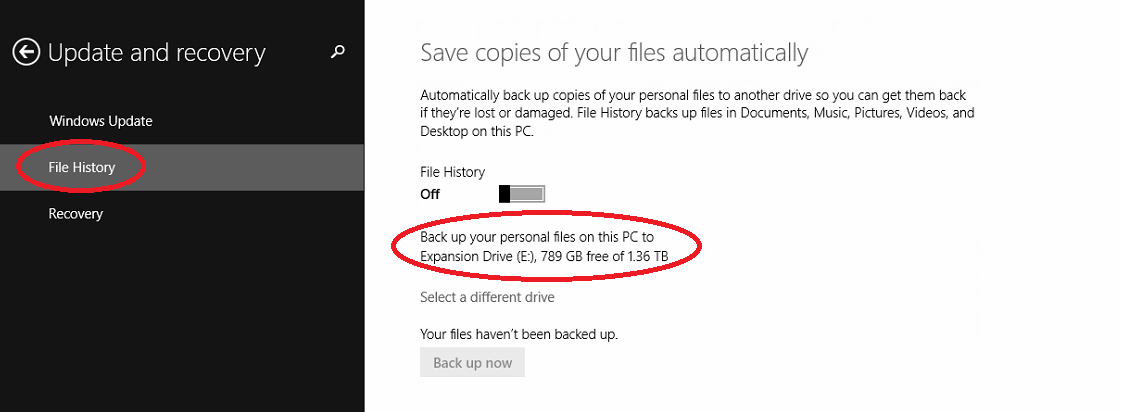
  5. In the Update and Recovery window, Select ‘File History’ at the side, the system will then search for available drives and should automatically select your USB storage.
    If it selects the wrong drive you can change the selection by clicking the ‘Select a different Drive’ link.
    Windows 8 Backup Update and Recovery Screen with File History and the Selected Drive Highlighted
  6. When ready, Switch ‘File History’ On
    Windows 8 Backup Update and Recovery File History Screen with File History On Highlighted
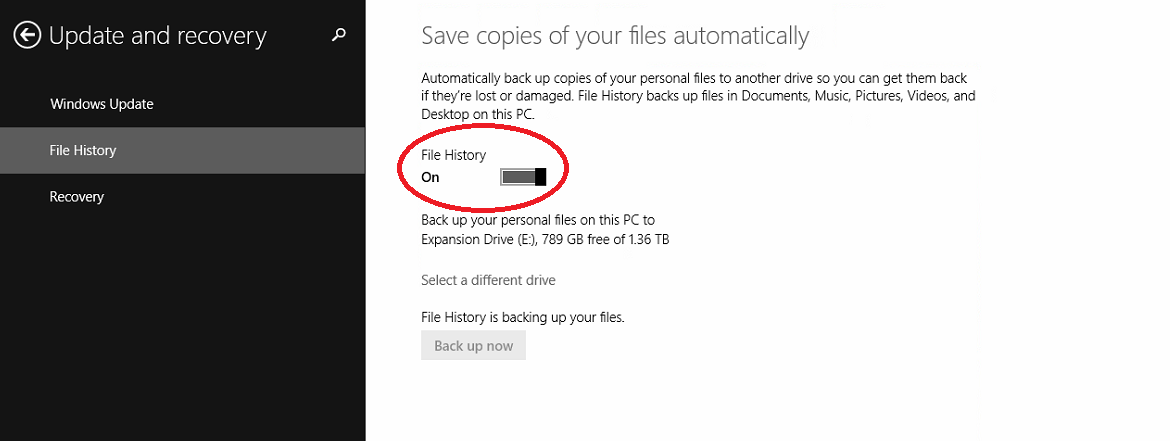
  7. Your Done! You files will now backup automatically to the drive.
    NOTE: This will only be files contained in your Windows library, so be sure to save all your important data to your Documents Folders.


Backing Up in Windows 7

  1. You will need a location to backup your data to, such as a USB drive attached to the computer, connect this now.
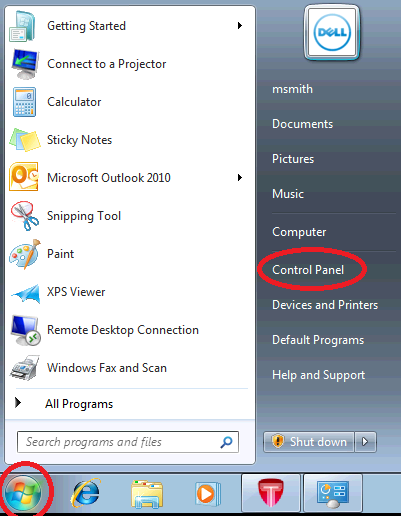
  2. Open the Windows Start Menu and select the ‘Control Panel’ Button
    Image of Windows 7 Backup Start with Start Button and Control Panel Buttons Highlighted
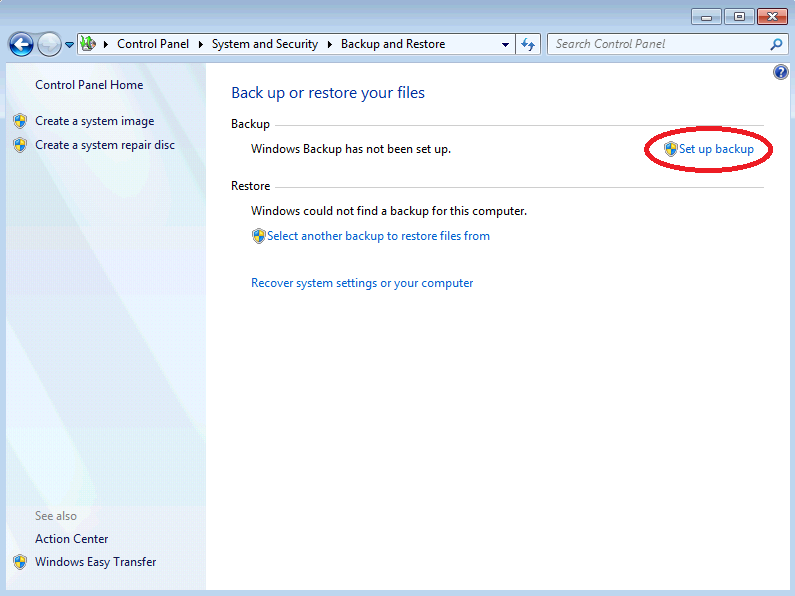
  3. Select ‘Back Up Your Computer’ from the Control Panel
    Image of Windows 7 Backup Control Panel with Backup Option Highlighted
  4. From the ‘Backup and Restore screen, Select ‘Set Up Backup’
    Image of Windows 7 Backup Control Panel Applet with Set Up Backup Option Highlighted
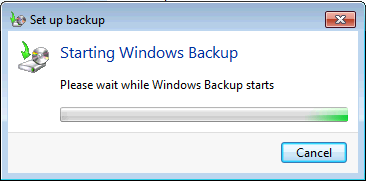
  5. Wait for Windows to start the Windows Backup Wizard
    Image of Windows 7 Backup Starting Windows Backup Screen
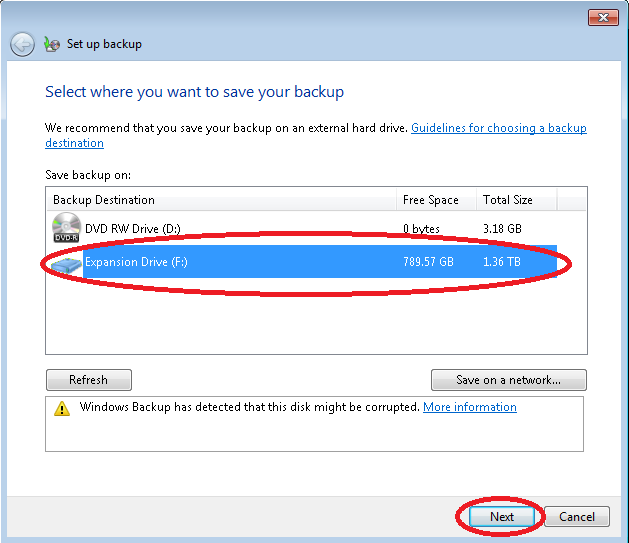
  6. When the Windows ‘Set Up Backup’ Wizard loads, Select the USB drive you connected earlier, then click ‘Next’
    Image of Windows 7 Backup Wizard Select a Drive Screen with USB Drive and Next Buttons Highlighted
  7. In most cases you can ‘Let Windows Choose’ the locations to backup, but if you feel you need to, you can choose the locations to backup yourself. Then just click ‘Next’
    Image of Windows 7 Backup Wizard with Default Windows Selection and Next Button Highlighted
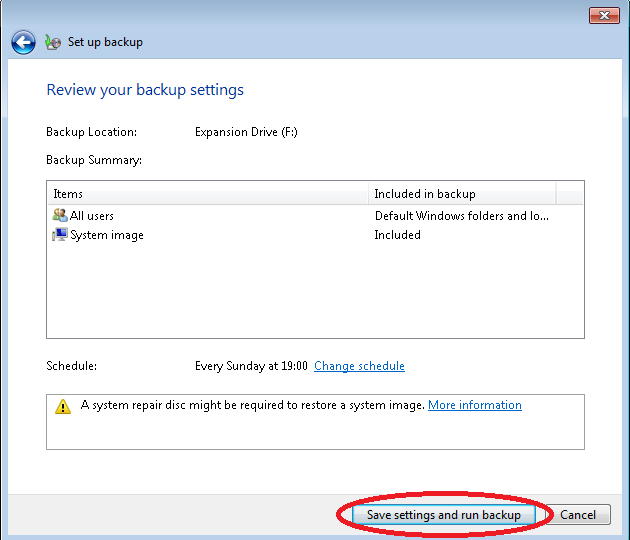
  8. Review the settings, if all is OK, select ‘Save Settings and Run Backup’. If you need to you can change when the backup runs by selecting ‘Change Schedule’
    Image of Windows 7 Backup Wizard with Save Settings and Run Backup Button Highlighted
  9. Your Done! Your backup will now run as per your schedule, by default this is ‘Every Sunday at 7PM’, Just make sure your computer is turned on at that time.


Written By: Ashley - Tetrabyte

Ashley is the I.T. Manager of Tetrabyte Managed I.T. and has worked with the director since 2009 to grow the company to the position its in today. As an MCSE and active member of the support team Ashley is able to advise on a wide range of topics and provides support to the team when and where needed.

Read More Posts by

Contact Us for a Simple Quote

  • This field is for validation purposes and should be left unchanged.

  • Microsoft Logo
  • HP Logo
  • Cisco Logo
  • Dell logo
  • Eset Logo
  • BT Logo

What Our Customers Say About Tetrabyte

  • Having now been with Tetrabyte some months and using their expertise in IT Support I can only praise the whole team for their professional attitude. They resolve issues quickly and go above and beyond by ensuring that when something is fixed it stays fixed… I am happy with their level of support and cannot but recommend them and their services.

    Hendri Cawood, London

  • …As always polite, knowledgeable and can do right now approach with a friendly and approachable personality never leaving me thinking that I am silly for calling even on the most simple of tasks.

    Sarah Veness, Hastings

  • The guys are always at the other end of the phone and log straight in remotely to fix the problem there and then (no down time). Whatever is necessary to get the job done the team at Tetrabyte will do it.

    Murray Greenhill, East Sussex

  • Since Tetrabyte have taken over the service, issues with IT are now at a minimum which is very important for the work that we do. I have no hesitations in recommending Tetrabyte to any other organisation, due to the high level of support they provide.

    Rachel Evans, London

  • I get many calls and emails from IT support companies offering their services but I am 100% confident that Tetrabyte provide the best service for our organization. I would certainly recommend them.

    Di Smith, East Sussex

  • We have worked with Tetrabyte for about seven years now and have found them to be brilliant. As somebody that isn’t the most IT literate, I have found them to be extremely helpful, patient and supportive…

    Debbie Hargreaves, St Leonards on Sea

What's going on in the world?

READ OUR BLOG